Tonearm Hum Fixing
Some Ideas Anyway
| Aures habent et non audient.
Psalms 114
|
Grounding
A cartridge carries three different types of grounds. The
first two are the signal grounds, which are on the
negative end of the windings on the two magnetic
coils in the cartridge, the green and blue wires. These are unique connections that
need to remain isolated from the chassis ground, the black wire, until
these signals get safely into the pre-amp.
 The chassis ground connects from the
shell of a cartridge (if it's metal) to the tone arm, plinth and metal body of the preamp.
If you have a plastic head shell there is no connection between the
cartridge ground and the tone arm. The chassis ground has one purpose, to shield everything from
motor noise and EMI (electrometric
interference). The chassis ground is not designed to play a part in
the signal, only to keep out
noise, and should not be connected to any part of the turntable
other than the tone arm. It only isolates the four signal and
ground wires
from cartridge to pre-amp.
The chassis ground connects from the
shell of a cartridge (if it's metal) to the tone arm, plinth and metal body of the preamp.
If you have a plastic head shell there is no connection between the
cartridge ground and the tone arm. The chassis ground has one purpose, to shield everything from
motor noise and EMI (electrometric
interference). The chassis ground is not designed to play a part in
the signal, only to keep out
noise, and should not be connected to any part of the turntable
other than the tone arm. It only isolates the four signal and
ground wires
from cartridge to pre-amp.
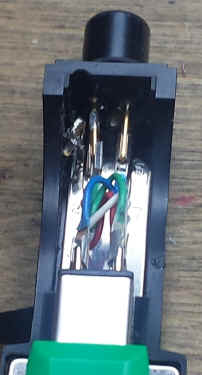
On my old Technics head shell I noticed that the green wire (right signal
ground) was soldered to the chassis ground. I removed this which
eliminated some of my low level hum.
I don't think that there should be any grounding done between the two
signal grounds and the chassis ground. This should be up to the
cartridge manufacturer but some of the earlier head shells did this.
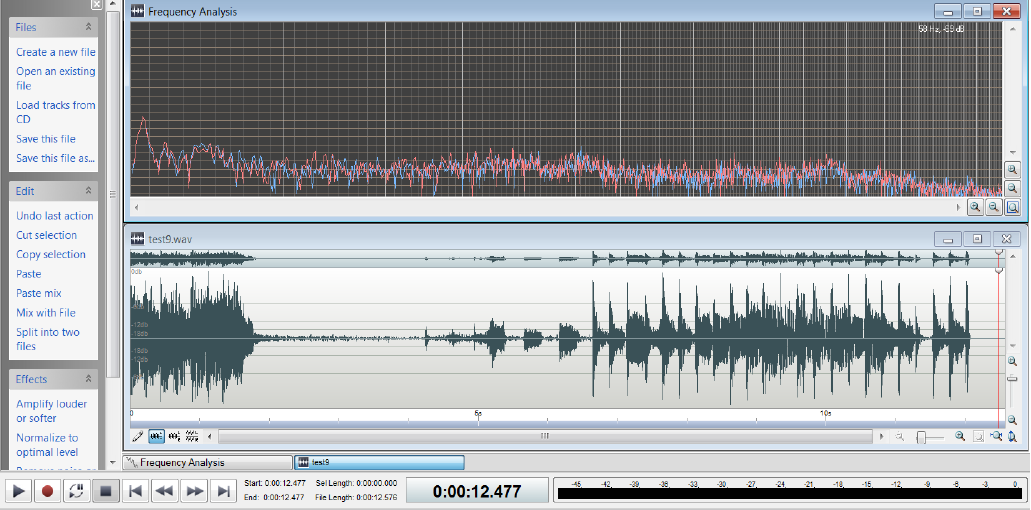
The signal produced was less hummy as shown below. It is probably
because I replaced the older head shell which was plastic. I like
metal headshels.
Rewiring Tone Arm
 This is perhaps an extreme move but it will reduce
noise. There are two major parts to a tone arm, the arm
itself that moves up and down and the plinth or base that moves
horizontally. The arm is held to the plinth by
two needle screws that are secured on each side with locking nuts or bushings.
To replace the wires you just about have to back
off the pin bearings and slide the tube out.
This is perhaps an extreme move but it will reduce
noise. There are two major parts to a tone arm, the arm
itself that moves up and down and the plinth or base that moves
horizontally. The arm is held to the plinth by
two needle screws that are secured on each side with locking nuts or bushings.
To replace the wires you just about have to back
off the pin bearings and slide the tube out.
Your basic material are a replacement set of wires, solder and gun,
a small screw driver and spanner wrench. Additional materials may be
tape and feeder wire. It is always good to braid or plat the wire into 5
strands if you are going to all this trouble.
The spanner wrench can be
built by using an old screw driver and a grinding blade to make a gap in the
center so it looks like a fork. The set screws come loose easily with
a spanning wrench and
do not need to be very tight. Take pictures
of the position of the set screws before disassembling the tone arm.
The plinth does not have to be removed, but the arm does because it has
locking bolts underneath that remove the little spring loaded contacts.
It's smart to de-solder the wires at the breakout board so you can just
braid the new wires and replace if you want to.
Braiding
I think it is always a good idea to braid tone arm
wires but not too tightly. There are five wires and the braiding process is pretty simple
for odd numbered strands. If the existing wires are OK just braid them
and replace. If they are old or defective, de-solder the wires at the
breakout and remove from the tone arm. Braid and reinstall. Leave lots of extra wire in front of
the breakout board.
Covering Head Shell
Sometimes I like to shield any exposed signal wires on
the headshell. That
goes for the cartridge head which can also pick up EMI. I
took some aluminum tape and wrapped the head. It increases the weight but
can result in noise reduction. Here I have an ADC
stylus in a standard head shell.
Fade
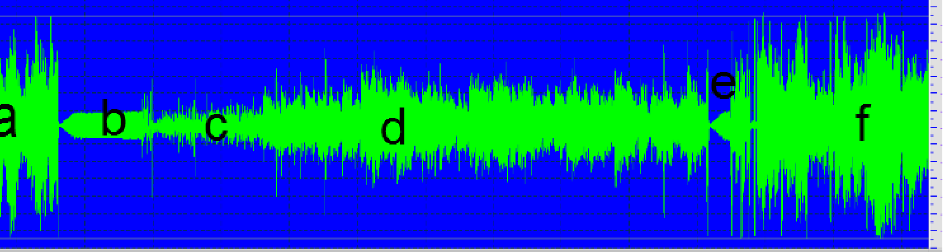
One thing I did notice was fading, that's what I call
it anyway. Notice below that a strong signal is recording and then the
stylus is lifted. The immediate result is good quiet but then a
gradual 60 cycle hum appears after one second.
This was my first indication I was getting feedback.
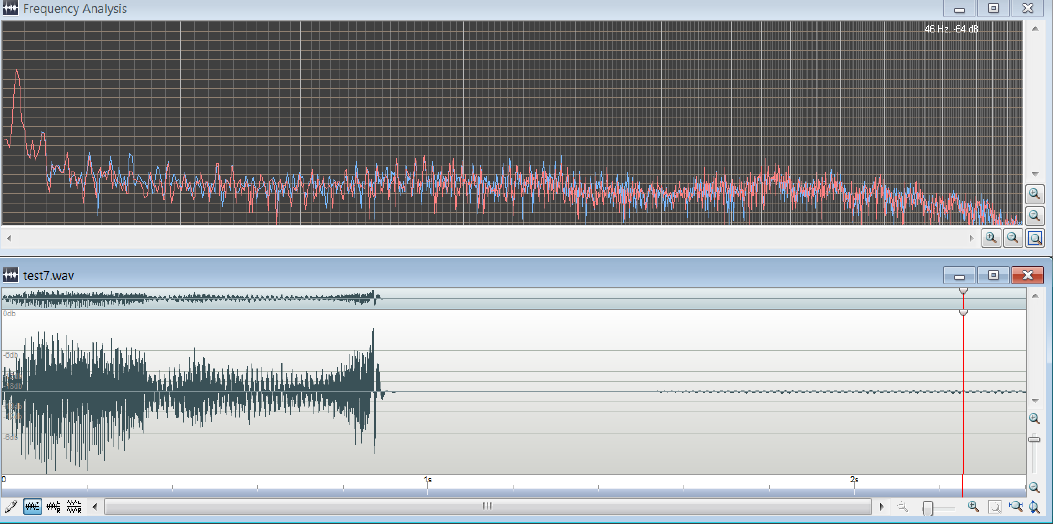
This had to lead me to suspect a noisy
sound card which was
introducing a slight 60 cycle spike after impedance dropped so I replaced
the sound card in my computer. The hum was reduced
noticeably.