| "If you come at the king, you best not miss"
|
When a record is made the cutter cuts across the master tangent to the groove (90 degrees). So when playing we try to get the cartridge to play as close to that same tangent angle as we can. This is done by the manipulation of overhang and attack angle. With proper adjustment it is quite possible to get pretty close to tangent, maybe within zero to five degrees over the entire playing surface of a record.
It should also be understood that manufacturers design their product with one preferred alignment in mind, even though the user is free to choose other alignments because just about all TTs allow both overhang an attack angle adjustment. But the tools provided are usually designed for just one type alignment and usually only consider overhang.
Furthermore alignment tools often overlook the cartridge cantilever which is not the same as the cartridge body. Cantilevers are the best measure of tangency and are constantly subjected to pressure during their useful life not just from the groove but from skating and anti-skating forces that vary over the record surface. It is therefore not uncommon to note that a cantilever may not be quite parallel to the cartridge shell. This is perfectly expected and doesn't necessarily degrade performance.
It is also quite common to see alignment tools that only adjust overhang and ignore cartridge angle. This is unfortunate but then a lot of average users do not want to get involved in the esoteric art of complex geometrics.
 Longer arms require less overhang and result in bigger null points.
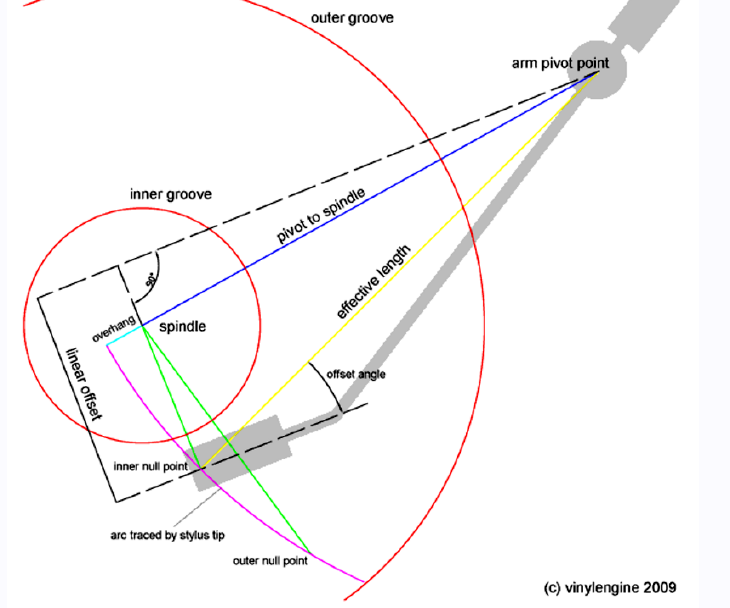
The PtoS is a constant which is built into the turntable by the
manufacturer and is
defined as the distance from arm pivot to spindle center.
Arm length (effective length) here means the actual distance from pivot to
stylus and this is usually adjustable and can change the overhang.
Longer arms require less overhang and result in bigger null points.
The PtoS is a constant which is built into the turntable by the
manufacturer and is
defined as the distance from arm pivot to spindle center.
Arm length (effective length) here means the actual distance from pivot to
stylus and this is usually adjustable and can change the overhang.
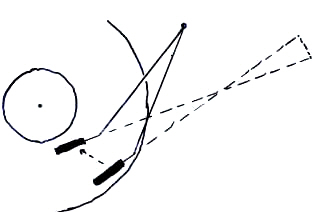
Turntables are designed with angular arms and overhang as a way to increase the apparent arm length and thus reduce tangential error since the apparent arm length is projected out to be longer than the actual arm length. In the diagram here we observe an apparent arm length which is approximately 1 and 1/2 longer than the actual arm length. It’s just geometry, not style, convenience, tradition or magic, but it's been done this way since stereo came along and tangency became more important in separating the two channels.
There are two points on a properly adjusted turntable where the tangent becomes zero, that is, when the stylus rides in the groove at exactly the right angle. These are called null points. Null points are determined by cartridge angle and arm length (actual arm length). Arm length can be adjusted quite a bit on tonearms with standard headshells but arms without headshells have little ability to change arm length unless they have slotted mounting holes. Many of them do. Changing arm length also changes overhang. This significantly effects null point adjustment. The ratio between PtoS and overhang is just as important as cartridge angle.
Changing arm length changes distance between null points. Changing the attack angle of the cartridge moves the null points together in or out from center but both these adjustments work somewhat together, and to get null points where you want them requires manipulating both arm length and attack angle a number of times. The objective is that a record is best played with a minimum amount of tangential error across the entire playing surface, or better said, the stylus should remain as perpendicular as long as possible during play.
Here is a picture of the issue (not to scale)
As mentioned above, null points can be moved by a combination of lengthening or shortening arm length and adjusting the attack angle of the cartridge which is mounted in a headshell and is already at some angle. Since a standard headshell allows about 11 to 13 mm arm length change and up to 15 degrees angle change, it is quite possible to arrive at just about any set of null points you may want.
However, the effective playing area begins at 145 mm from center and ends at 65 to 70 mm from center. There are few record manufacturers today that dare cut closer than 65 mm from center. Even though the inner groove standard is supposed to be 60.325 mm from center, many turntables will go into return cycle before that point. It is for this good reason that no record is cut closer than 65 mm from center, even though high end turntables usually have no return mechanism so they don't have to worry about the amount of deadwax.
The three advertized alignments and their null points are:
Baerwald 66 and 120.9
Loefgren 70.3 and 116.6
Stevenson 60.325 and 117.42
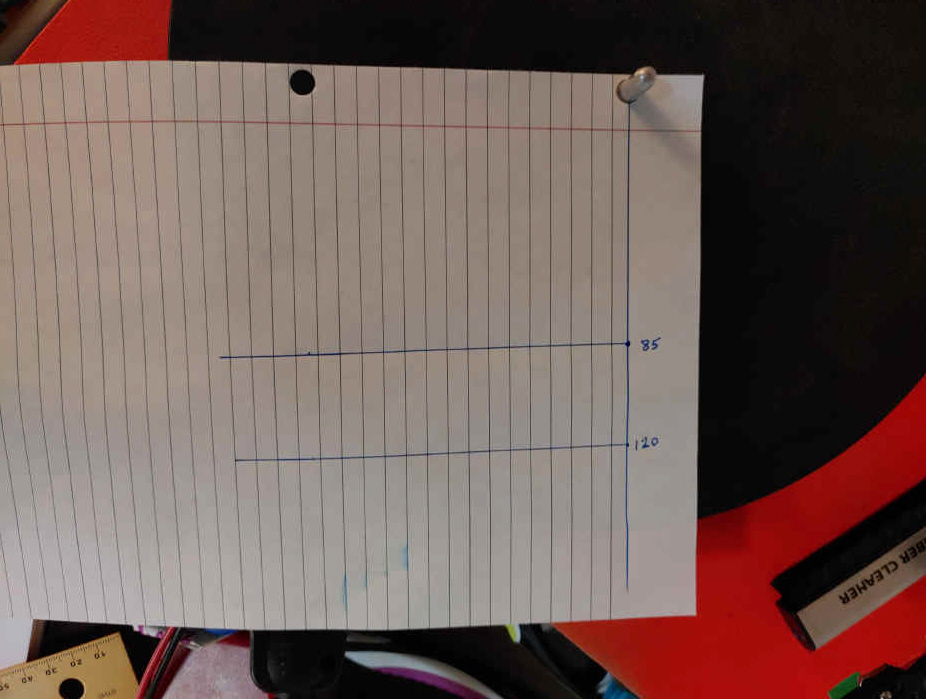
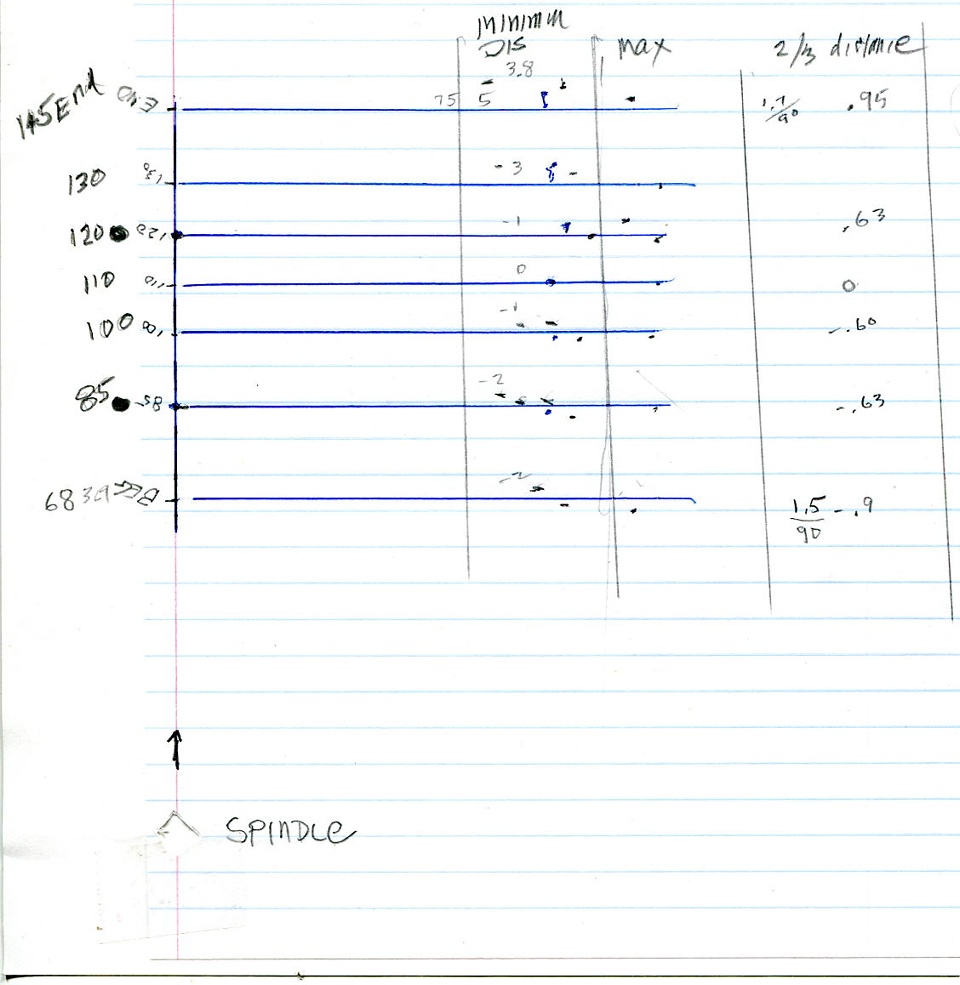
Take a sheet of lined paper and punch a hole on the upper right side on the top line or use one of the holes. This becomes the spindle center and the line becomes your index line. Then mark your preferred null points on the index line. Here I use my null points (85-120) but you may want to use your own nulls like 90-125, which would emphasize the second and forth piece on a five selection side, or perhaps an 80-115 which gets a fatter part of the surface. Project a right angle out from your two points. You now have your template.
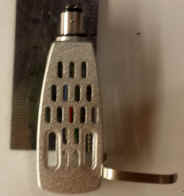
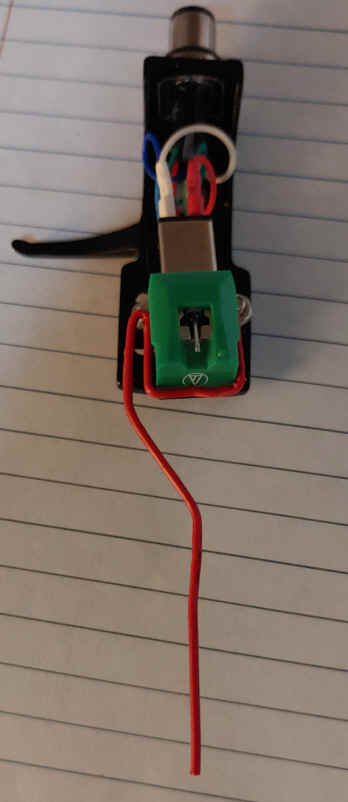
Now you need a way to project the true perpendicular from the cartridge cantilever onto the template. The pointer is mounted on the body of the cartridge and moves as the cartridge is adjusted. If your cartridge does not come with a pointer you can make one with a paper clip just so the tip of the pointer lines up with the cantilever. I used a paperclip in this example. The picture is at an angle so it looks a little off. Just the tip has to line up. Not the whole thing. In this example I used my custom homemade TT and the optimum attack angle was about 10 degrees which is pretty excessive. In a production TT the attack angle is often close to zero.

There are various techniques described everywhere
for null point adjustment and I think it may depend on the
turntable, tonearm and cartridge but it does involve a template, a
number of repetitive length and angle adjustments and then some
performance listening. As
described above, changing the arm length will increase or decrease the tracking
arc thus moving the null points closer or farther apart. Rotating
the cartridge will move the null points in and out and somewhat
effect the distance between points. When the distance between your null
points is good your overhang is good. Rotating the angle of the
cartridge changes the position of the two points.
Here's an interesting experiment. I first extended the cartridge out to the very end of the headshell giving the arm a maximum length just to see what would
happen. It was really bad. I then adjusted to the middle of my headshell and
began to change the
angle until I got my inner null point and then repeated the process against
the outer null point. When I got
satisfactory adjustments of both points I aligned the pointer to the
position of the cartridge and marked off each angle.
If your pointer is taped to the headshell you have to readjust it every time
you change the angle of the cartridge by sighting down the cartridge
to the cantelever, fixing the pointer over the stylus and adjusting the far end of
the pointer until it aligns with the new stylus angle. That can be a pain.
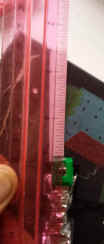
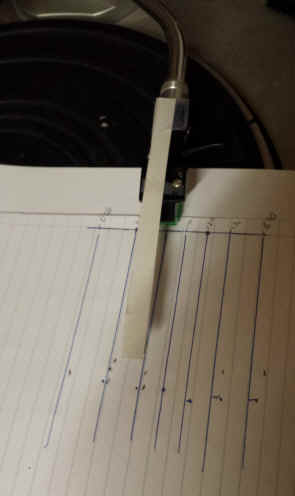 When taking measurements it is important to
carefully sight down the spindle axis to make sure that your stylus is right
on the index line because this makes a huge difference in the tangent angle.
Then place the stylus exactly on its point lock the TT with some cardboard and mark off the displacement.
When taking measurements it is important to
carefully sight down the spindle axis to make sure that your stylus is right
on the index line because this makes a huge difference in the tangent angle.
Then place the stylus exactly on its point lock the TT with some cardboard and mark off the displacement.
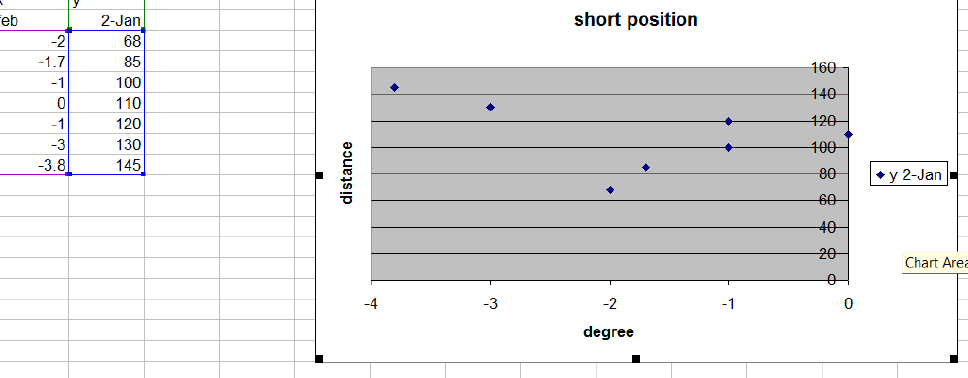
Next I moved the cartridge all the way up on the headshell to get the shortest arm length and repeated the tests. It was hard to get null points at both extremes but it gave me a general idea where the "soft spot" was. I decided that about 2/3rds down the headshell was about the best spot and it generally is. I did a third set of tests at that location. The results were quite satisfactory because all readings were within one degree of tangent (and that is damn good).
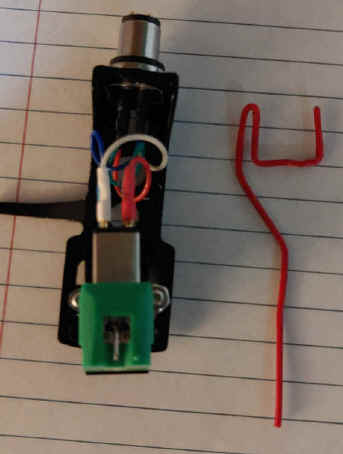
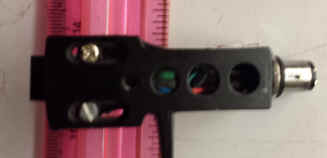 Here is my final cartridge adjustment.
It is about
5 degrees clockwise and about 1/3 of the way down the adjusting slot.
Here is my final cartridge adjustment.
It is about
5 degrees clockwise and about 1/3 of the way down the adjusting slot.
 Here I'm
checking the alignment of the pointer with a ruler just to make sure that it
is on line with the side of the cartridge.
Here I'm
checking the alignment of the pointer with a ruler just to make sure that it
is on line with the side of the cartridge.
Here is my template/worksheet. I started by finding the null points with cartridge midway and at zero rotation. The distance between the nulls was too much so I gradually brought the cartridge back till I got 35mm. I then rotated the cart to bring the nulls to 85 and 120.
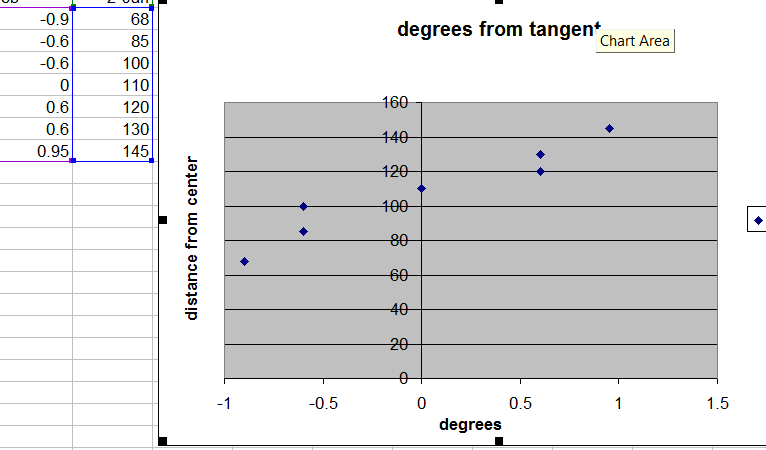
Here is a scatter chart of tangent error taken at minimum arm length.
Here is a scatter chart of the optimum tangent error. All samples are within one degree.