Here are some of the tools I used.
You may not need them but I did.
Here are some of the tools I used.
You may not need them but I did. Dominic Vautier
2-10
updt 11-15
As with any frontloader bearings go bad, but there are several really good sites that describe how to replace bearings on your Neptune washer. My Neptune washer has performed well over the years except for the R11 problem that cost me a new circuit board.
I wash about twice a day, or at least once a day. So after 9 years, three kids and two adults I have probably a lot of miles on it.
When bearings go out and you get 747 type noise during high spin. So I ordered the seal replacement kit along with a set of bearings. The seal replacement kits are easy to find but the bearings take a little more googling. Check out a bearing supply store because the Maytag guys want to sell you the whole basket for $500 and that's more than the entire unit is worth.
Like everything else in this world, bearing replacement looks and sounds a lot easier than it actually is. There are several good descriptions on the web about this job but I found some steps have been left out and they are very important steps.
Here are some of the tools I used.
You may not need them but I did.
1. A really big sledge hammer, about 9 lbs will do.
2. A smaller mallet.
3. Wire brushes.
3. Good pair or "C" ring removers. Go to a car parts store like NAPA and get a good one. Do yourself a faver.
4. A long metal rod to finish hammering bearings. I made mine from an x-type lug wrench. Didn't need the forth socket.
5. A bearing puller. This is a modified resonance puller that can be gotten from any auto parts store. Get a whole bunch of washers to go with the puller. Buy lots of washers that are bigger than the bearings.
6. A big fat piece of metal or bar with a hole in it to pull the drum fully into place after it has been reinstalled. This is very important because that seal pushes against the drum and must be in place.
7. A freezer to cool your bearings (and jets).

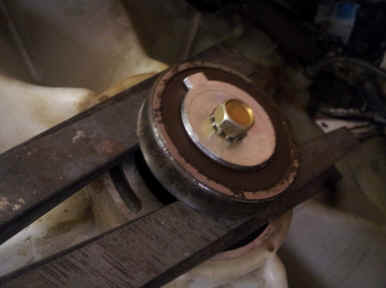
1. Remove spin basket pulley-easy to do.
2. Remove spin basket. A couple good shots with the big sledge
against a 2x4 does it. If not just use the bare metal. you are
not going to damage that shaft.
3. Put lots of wd-40 on everything. Remove "C"
ring-easy to do if you have a good ring remover. Otherwise swear a lot.
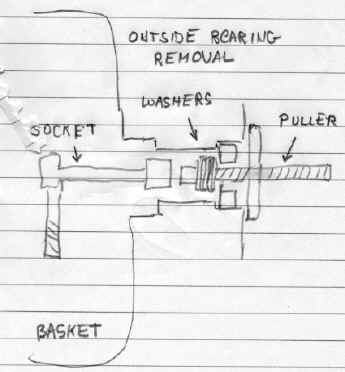
4. Remove outer bearing with puller. I used a socket extension
to get to the bolt (see diagram). This was hard to do.
5. Remove inner bearing with puller. Very hard to do. It needed some help with
the metal rod and the big sledge and one of my sons.
6. Clean everything. take a 300 sandpaper and remove dark ring
on outside of race and on front and back race on tub shaft.
7. Drive freezing bearings into place with puller. Easy to do. Replace "c" ring. Don't forget the sleeve
between bearings although I don't see why it's there. Both races have a shoulder.
Go figure.
8. Push spin basket in. Basket is not yet seated. you must
seat basket
9. Put retaining bolt into big flat piece of iron and tread into end
of basket spindle, making sure you have several threads on it for torque.
10. Wedge two sockets on either side of bar and start to slowly
tighten bolt to seat spindle.
11. Continue with larger sockets until spindle is well seated. If
not seated seal will leak because the seal must contact the basket.
12. Finish assembly.
I hope that this along with some of the other information leads to a successful repair.
I had another problem with my washer some time later. This next time it was posessed by evil spirits.
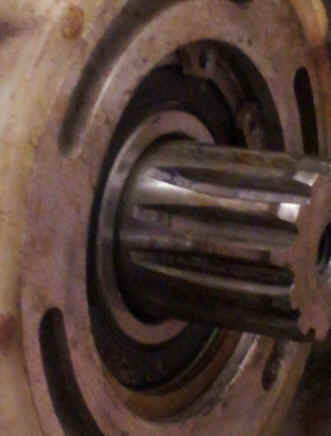
Here is what the shaft should look like when fully seated
Below demonstrates another way to pull the shaft into the bearings. It should keep popping until in place.