Machine Sewing Buttons
| I hate to see a
good woman go to waste.
From Here to Eternity
|
D Vautier
1/2023
 I think that once you machine
sew a button you will probably never hand sew one again. Of course
this is not saying much because for many years I usually just used a
safty pin anyway (until my eyes were opened). In any case, there
is something profound about sewing buttons. It's the
accomplishment more than the act. It's the shear, objective,
sexless, simple, fulfilling, practical accomplishment of it all.
I think that once you machine
sew a button you will probably never hand sew one again. Of course
this is not saying much because for many years I usually just used a
safty pin anyway (until my eyes were opened). In any case, there
is something profound about sewing buttons. It's the
accomplishment more than the act. It's the shear, objective,
sexless, simple, fulfilling, practical accomplishment of it all.
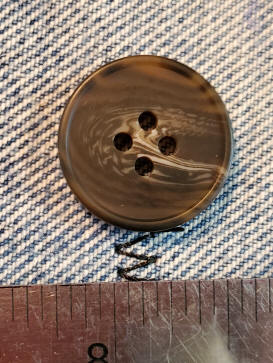
I like 4-eyed buttons. The 4-eyed button has an
advantage over 2-eyed buttons because there are different ways to sew
it; parallel or cross-ways or a combo, and it is a lot stronger to boot.
But some machines may not be able to zig more than 3/16th inch which is
a little more than the cross distance of a standard button. I like to parallel sew them
where the distance is at or near a more comfortable 1/8th and 3/16th inch
and the alignment is way easier. The scale at right shows that
3/16 is real close for parallel button sewing.
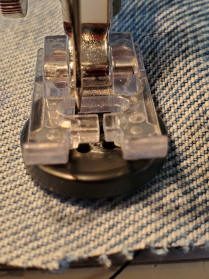
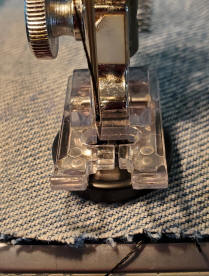 All you need is a zig-zag
machine and a dropping feed dog. Mount a clear plastic zig-zag
foot and do a test to get a 3/16 zig (which is 4.5 on my machine
dial). When you have a close fit, drop the feed dog, raise the
foot and place the button and material squarely under the foot. I
found out its easier to start with the front left eye. Once the
needle is adjusted on the eye, it should be able to do the other eye
when it zags. Run 8 or 10 stitches very slowly. Now move the
button directly forward without breaking thread and do the back two
eyes. Remove the work.
All you need is a zig-zag
machine and a dropping feed dog. Mount a clear plastic zig-zag
foot and do a test to get a 3/16 zig (which is 4.5 on my machine
dial). When you have a close fit, drop the feed dog, raise the
foot and place the button and material squarely under the foot. I
found out its easier to start with the front left eye. Once the
needle is adjusted on the eye, it should be able to do the other eye
when it zags. Run 8 or 10 stitches very slowly. Now move the
button directly forward without breaking thread and do the back two
eyes. Remove the work.
 As
with all sewing runs you get 4 loose ends; two starting, two ending (on
top and bottom). The two starting threads are locked so just snip
them. Now you wiggle the bottom ending
thread to get your last loop. Pull the loop through and and get
the top thread. Tie and snip the two.
As
with all sewing runs you get 4 loose ends; two starting, two ending (on
top and bottom). The two starting threads are locked so just snip
them. Now you wiggle the bottom ending
thread to get your last loop. Pull the loop through and and get
the top thread. Tie and snip the two.
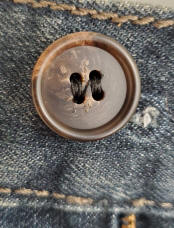 Job done.